Direct ignition coils are a common failure item in a vehicle’s ignition system. How do you truly know if your vehicle’s misfire is due to ignition coils? An engine misfire can be so many things. Ignition, electrical, mechanical, the list goes on and on.
What are the symptoms of bad ignition coils?
- Engine misfires
- Rough idle
- Loss of power
- Reduced fuel economy
- In extreme cases stalling
- Check engine light
- Car won’t start
Ignoring these signs usually just results in an annoyance. Whether that’s just using more fuel than usual, or if it means getting stuck in a parking lot with your car refusing to start.
How long will it take to replace ignition coils?
Depending on the car, this job can be done in under 2 hours. While you’re replacing your ignition coils, we recommend inspecting and replacing your spark plugs at the same time.
How much does it cost to replace ignition coils?
If you plan to take your car to the dealer to have this job done, you’d be looking at spending in the realm of #4500. By purchasing the parts through us and doing this job yourself, you will only pay a fraction of the cost.
Tools needed to diagnose and replace car ignition coils:
- OBDII Scan Tool (Optional)
- Underhood LED Light (Optional)
- Screwdriver Set (Optional)
- Dielectric Grease
Step 1: Diagnostics
In our case, diagnostics is simple. Our car had a check engine light and was idling noticeably rough. If you have a cylinder misfire, you should have a check engine light on. If you own a scan tool (which we highly recommend if you own any OBDII cars), now would be the time you plug it in to check which cylinder is misfiring. On our car, our scanner shows that we have a misfire on cylinder number one. If you’re using a scan tool, you can skip ahead to step five.


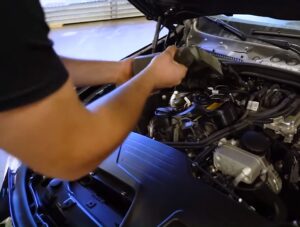
Step 2: Remove Engine Covers
Start by removing engine covers and anything obscuring access to your injectors. Since these injectors fit a wide range of car models, this process will be different for everyone.
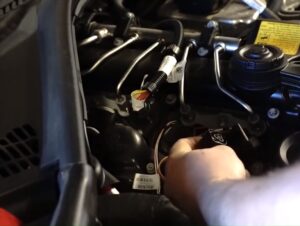
Step 3: Disconnect One Coil at a Time
While the car is running, disconnect the wiring to the cylinder number one ignition coil and listen for a change in sound at idle. If there isn’t a discernible change in sound, you know that cylinder number one was the problem. If there was a noticeable change in sound or the operation of the engine, you know it was a cylinder other than number one. If that’s the case, continue down the line until you find your problem cylinder.
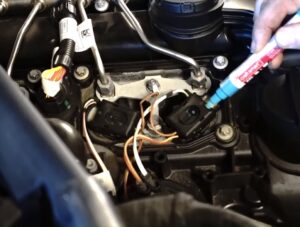
Step 4: Remove and Alternate Coils
Once you’ve honed in on which ignition coil is the potential culprit, you can confirm this by swapping that coil with one you know is properly functioning. Making a mark on the bad coil will make your life easier as you can easily lose track of what cylinder you moved it to.
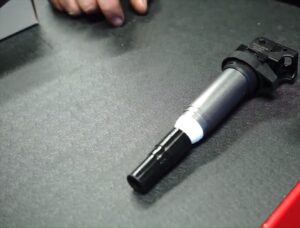
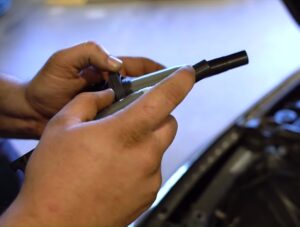
Step 5: Inspect Coil Boots
While you’re alternating ignition coils, you might as well inspect the boots for imperfections. Even the smallest hole or tear will cause a grounding issue – making that ignition coil ineffective. Here on our car, cylinder number one coil had a pinhole in the boot. Since you’re already here, we recommend purchasing your car-specific kit and replacing all of your ignition coils at the same time.
Step 6: Install New Coils and Reassemble
Whether you’re replacing just one coil or all of them, the process is quick and simple. Apply a very small amount of dielectric grease to the inside of the coil boot; this will make them much easier to remove in the future. From this point on you’re just seating the coils on your plugs, reconnecting the wiring, and reinstalling your engine covers.